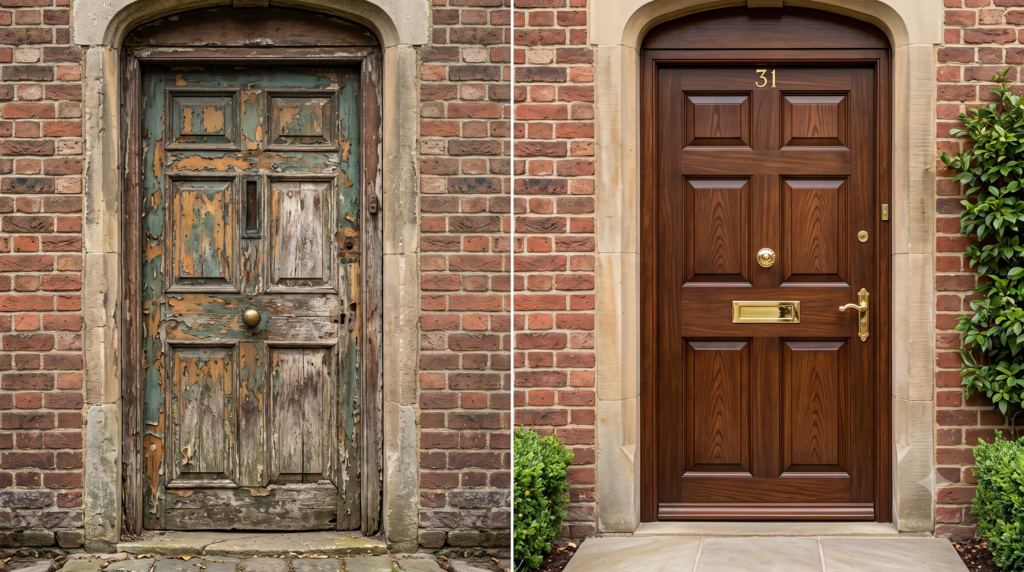
Bring your home’s entrance back to life! Discover how to restore old wooden front doors with our practical, friendly 8-step guide to DIY restoration.
How to Restore Old Wooden Front Doors Easily
Nothing matches the kerb appeal of a beautifully maintained entrance. Your front entryway is the first thing guests notice, and a weathered entrance makes the whole property look tired. Traditional timber doors are full of character and well worth rescuing. If you have ever wondered how to restore old wooden front doors without spending a fortune on a replacement, you are in exactly the right place.
In this practical and friendly guide, we are going to break down exactly how to restore old wooden front doors using straightforward, stress-free techniques. By following our easy steps, you will confidently master this home improvement task, ensuring your home makes a fantastic first impression for years to come.
Materials and Tools You Will Need
Organising your workshop beforehand ensures a smooth process.
For the Restoration Process
- A high-quality wood stripper or heat gun (To remove decades of old paint or varnish layers safely).
- Coarse, medium, and fine sandpaper (Essential for creating a perfectly smooth surface).
- Exterior wood filler (To repair any deep cracks, holes, or rot).
- Premium exterior wood stain, varnish, or paint (To protect against the unpredictable British weather).
- Good quality wood primer and undercoat (If you are opting for a painted finish).
Essential DIY Tools
- A sturdy pair of saw horses or a flat work table
- Screwdrivers and a hammer (For removing the door furniture).
- High-quality paintbrushes or a foam roller
- A dust mask, safety goggles, and heavy-duty gloves
Why Wood Preparation Is Your Secret to Success
The secret to a durable finish lies entirely in your patience during the preparation stages.
When you learn how to make a beautiful home or discover how to fix up your entryways, jumping straight to the painting stage is a massive mistake. Timber moves with shifting temperatures throughout the year. Applying paint over cracked varnish or hidden rot causes the finish to bubble and fail within months. Mastering this traditional preservation process simply means putting in the hard graft during stripping and sanding to create a perfect foundation for your topcoat.
How to Restore Old Wooden Front Doors in 8 Easy Steps
Here is your structured blueprint to achieving a stunning, professional finish in your own time.
- Remove the Door and Hardware Safely. Unscrew the hinges and carefully lift the heavy timber entrance onto your saw horses. Unscrew all the door handles, letterboxes, locks, and numbers. Keeping your workstation flat and clear is the vital first step when exploring how to restore old wooden front doors successfully.
- Strip Away Old Paint and Varnish. Apply chemical paint stripper or use a heat gun to soften old layers, then scrape away the bubbling residue gently with a wide knife without gouging the timber. This deep strip is essential to knowing how to reveal the raw grain safely.
- Dig Out and Treat Any Timber Rot. Examine the bottom edges for dampness, scrape out any decayed fibers, and apply a generous coat of wet rot wood hardener to strengthen the remaining timber. Managing these hidden structural issues early on is a brilliant insider secret as you discover how to restore old wooden front doors that last.
- Fill Cracks and Holes Thoroughly. Mix exterior wood filler and press it firmly into old screw holes or cracks using a putty knife, letting it dry completely according to packet instructions. Ensuring everything is level is the core skill when mastering your woodwork projects efficiently.
- Sand the Entire Surface Progressively. Grab your sandpaper and start with a medium grit to flatten the filled areas. Gradually move to a fine grit, sanding strictly in the direction of the natural wood grain to prevent scratches. Creating a perfectly smooth texture is a top tip as you discover how to restore old wooden front doors safely.
- Wipe Away Dust and Apply Primer. Vacuum the entire surface and wipe it down thoroughly with a tack cloth to remove every single speck of sawdust. If you are painting the surface, apply a high-quality wood primer to seal the raw timber. Knowing how to restore old wooden front doors with a clean foundation ensures absolute longevity.
- Apply Your Chosen Protective Topcoats. Stir your exterior paint, stain, or varnish gently. Apply the first thin coat using smooth, even strokes along the grain. Let it dry completely, sand very lightly with fine paper, wipe away the dust, and apply a second coat. Now that you know how to restore old wooden front doors, patience between coats is vital.
- Reattach the Hardware and Rehang. Once the final coat has cured completely, screw your polished or new hardware back into place. Lift the door back onto its hinges and check that it swings smoothly without catching the frame. Your beautiful, fully restored entrance is now ready to face the elements proudly!
Now that you have mastered this classic DIY skill, you can enjoy a stunning entrance that boosts your home’s kerb appeal instantly. Taking the time to prepare the timber properly always yields the absolute best results. Happy restoring!
Frequently Asked Questions
Can I complete this project while the door stays on its hinges?
While it is technically possible to sand and paint a hanging door, it is highly discouraged. Working horizontally prevents ugly paint runs, makes stripping significantly safer, and allows you to seal the top and bottom edges properly.
What is the best time of year to tackle this project?
Aim for a dry, mild weekend in spring or early autumn. High humidity or direct, blistering summer sun can cause your paint or varnish to dry much too quickly, which ruins the smooth finish.